Chitika
How to install a graphics card?
Sunday, April 25, 2010Posted by
Urvish Sohaliya
0 Comments
So, you've chosen your shiny new card, and it now lies waiting within its box. How do you actually go about installing a graphics card? Here is a complete guide to graphics card installation.
You will require:-
- A screwdriver
- An anti-static wristband (optional)
- Software drivers for your new card - should come on a DVD with the card, or you may wish to download the latest drivers from the internet
Step 1 - Having removed your old drivers if necessary, shut your PC down, and unplug all cables from the back. Put your case on a desk or similar work area where you have easy access.
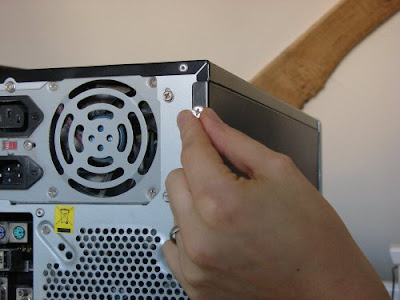
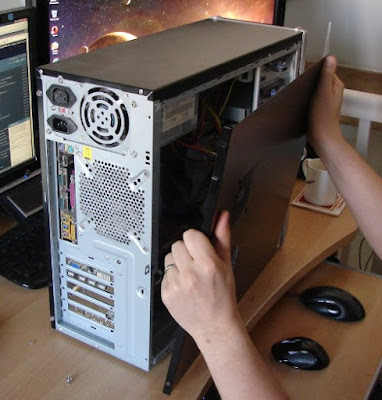
Step 2 - Remove the side from case to allow access to the internal components. This will probably require you to unscrew a couple of screws that hold the sides of the case on - many cases have two large thumb screws to make this operation easier.
Unscrewing the side of the case
Removing the side of the case
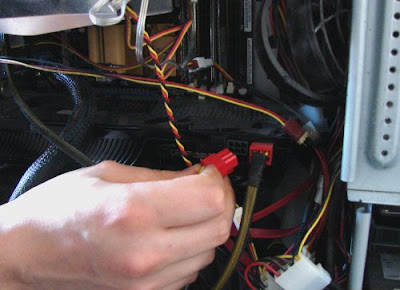
Step 3 - If you are replacing an old graphics card, identify it within the case. Wear an anti-static wristband or touch the metal side of the case to prevent build up of static electricity that may damage sensitive electronic components. Move or unplug any cables obstructing access, and any screws that may connect the backplate of the card to the case. Unplug any power cables attached to the card. Lift the blue lever at the top right of the socket (Highlighted in the picture below) to release the graphics card, and gently but firmly pull it out of the motherboard.
Unscrewing the backplate of the card from the case
Removing the power cables
Lift the blue lever (circled) to remove the graphics card
Plugging the PCIe power cable in - it will only fit in the correct orientation
Step 5 - Replace and cables you may have unplugged to allow access and replace side of case. Screw in case screws.
Step 6 - Return your PC to its original position and plug all cables back in. Boot the PC up and install your new drivers, if switching between ATI and Nvidia.
Step 7 - Congratulations, you have installed your new graphics card!
Labels:
Graphics Card
Subscribe to:
Post Comments (Atom)


